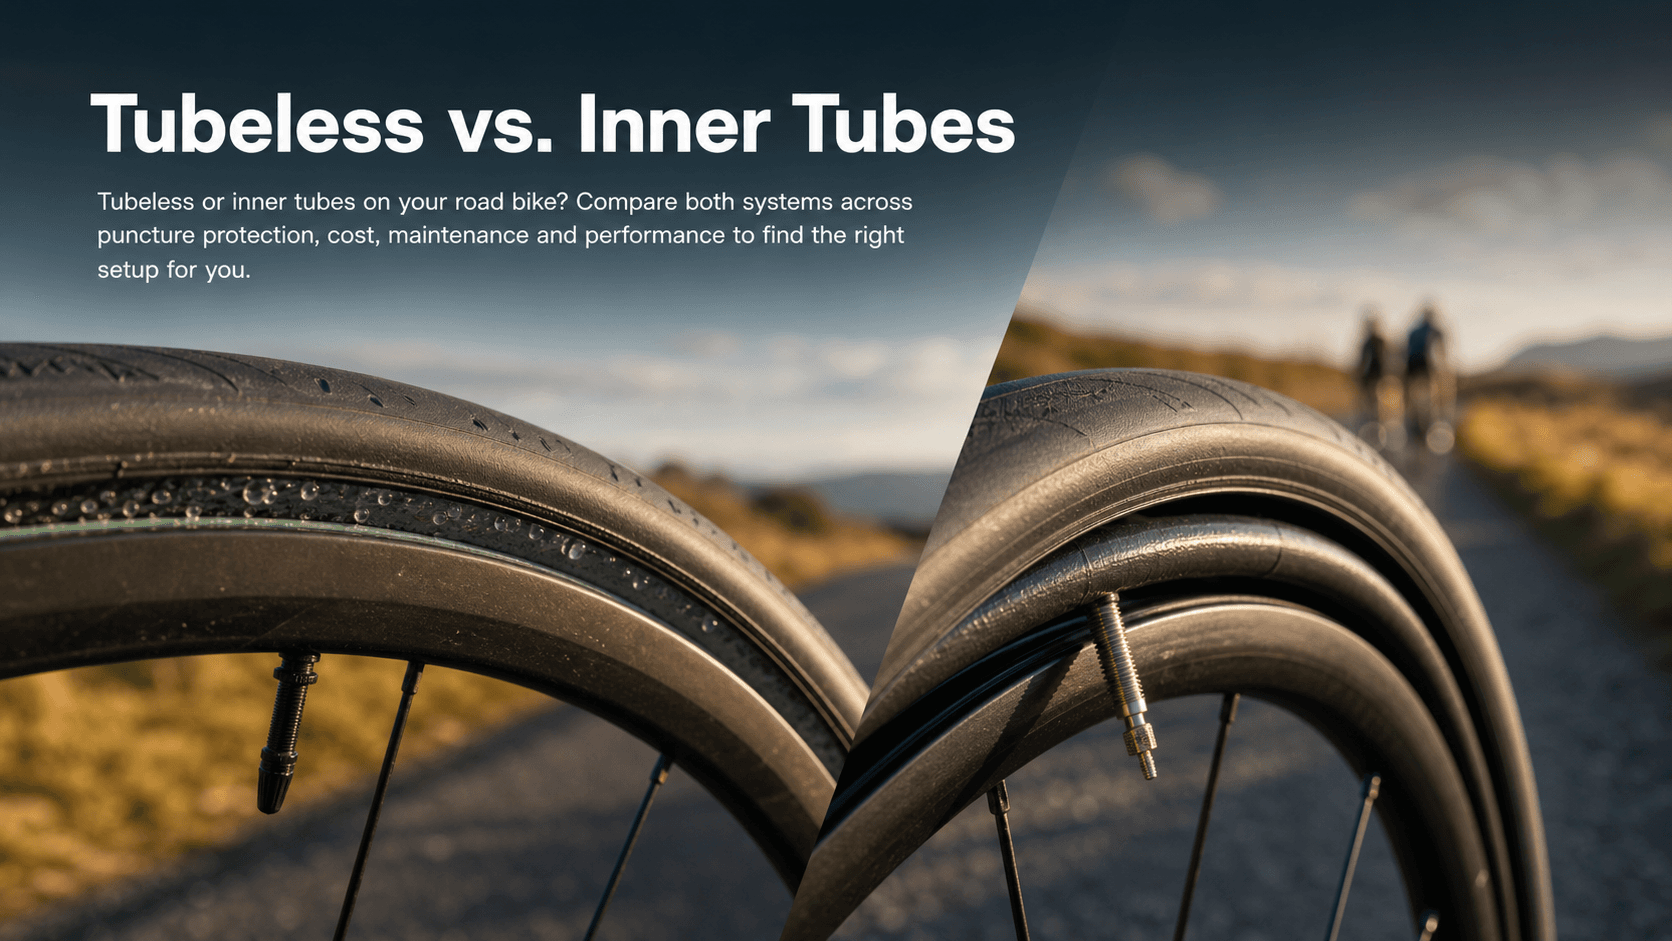
Tubeless vs. Inner Tubes
Tubeless or inner tubes on your road bike? Compare both systems across puncture protection, cost, maintenance and performance to find the right setup for you.
Every road cyclist hits this crossroads eventually. Your mate at the Saturday club run swears tubeless changed his riding life. Another club member says it's messy, temperamental, and he's sticking with tubes. So who's right?
Neither of them, really. The honest answer is: it depends on you, your roads, your wheels, and how much faff you're willing to tolerate. This guide cuts through the noise so you can make the call for yourself.
TL;DR: the quick answer by rider type
If you want the short version before diving in:
- If you ride rough roads frequently and don't mind a bit of upkeep → go tubeless. You'll likely deal with far fewer roadside stops.
- If you want maximum simplicity and low admin → stick with inner tubes. Modern butyl or TPU tubes are genuinely good and need zero prep.
- If you already have tubeless-ready wheels and tyres → you're halfway there. Whether you commit to tubeless just comes down to your tolerance for sealant maintenance.
- If you race under strict event rules or ride hookless rims → check compatibility carefully before committing to either setup change.
What are we actually comparing?
Before getting into pros and cons, it helps to understand what each system physically involves.
Tubed: A rubber inner tube sits between your tyre and rim. The tube holds the air. Simple. The tyre doesn't need to be airtight on its own, the tube does the work.
Tubeless: The tyre bead seats directly against the rim, forming an airtight seal. You need tubeless-specific rim tape to seal the spoke holes, a tubeless valve (threaded through the rim), and liquid sealant inside the tyre to plug small punctures as they happen.
You'll see two terms that often confuse people: tubeless-ready (TLR) and tubeless-compatible (TR). TLR generally means the tyre or rim is purpose-built for tubeless use, with the right bead design and construction to seat and seal reliably without a tube. TR (or 'tubeless-compatible') is a broader claim that varies by manufacturer, it often means the component can work tubeless, but check the specific rim and tyre ratings before committing. Mixing TLR tyres with non-TLR rims (or vice versa) is where setups go wrong.
As Stan's Tubeless Guide outlines, a proper tubeless system needs the right rim, matching valves, quality rim tape, sealant, and the correct tools. None of these is expensive in isolation, but together they add up and require the right combination.
Where road punctures actually come from
Knowing your enemy helps you pick the right defence.
Road cyclists typically encounter four puncture types:
- Small glass shards and thorns, the most common cause. These create tiny holes that often seal themselves on a tubeless setup before the tyre even loses meaningful pressure.
- Larger cuts and gashes, from flint, road debris, or kerb strikes. These are too big for sealant alone and will require a plug or tube regardless of your setup.
- Pinch flats (snakebite punctures), caused by riding a tube-tyred wheel too hard into a pothole or sharp edge, which pinches the tube against the rim, creating two small holes. Tubeless eliminates this category entirely.
- Valve and sidewall failures, less common, but both setups are vulnerable. Tubeless valves can clog with dried sealant if not maintained.
Cycling UK notes that tubeless tyres allow riders to run lower pressures without the risk of pinch punctures, a genuine advantage on rougher British roads where you'd otherwise need to run hard to avoid snakebites. The flip side: when a tubeless tyre does get a cut that sealant can't handle, your options at the roadside are more involved than simply pulling out a spare tube.
A fair comparison: tubeless vs inner tubes (and where TPU tubes fit)
| Tubeless | Standard butyl tube | TPU tube | |
|---|---|---|---|
| Small puncture protection | Excellent (self-seals) | None | None (but very light) |
| Pinch flat risk | None | Moderate to high | Low to moderate |
| Rolling resistance | Potentially lower at right pressure | Moderate | Low (comparable to latex) |
| Comfort at lower pressures | Good | Limited (pinch flat risk) | Limited |
| Setup cost | Higher (tape, valves, sealant) | Low | Low to moderate |
| Ongoing maintenance | Sealant top-ups every 2–6 months | Minimal | Minimal |
| Roadside repair | Complex (plug, boot, or tube) | Simple (spare tube + levers) | Simple (spare tube) |
| Weight | Slightly lighter (no tube) | Moderate | Very light |
Where TPU tubes fit in
TPU (thermoplastic polyurethane) tubes deserve a mention. They're significantly lighter than standard butyl, comparable in rolling resistance to latex, and more puncture-resistant than latex. They don't require any sealant, seat like a standard tube, and are easy to repair with the right patches. If you want better performance from a tubed setup without the complexity of tubeless, TPU is a genuine modern alternative, not a gimmick. Latex tubes offer similar rolling resistance benefits but are more fragile and need checking for pressure more regularly.
That said, neither TPU nor latex tubes self-seal. If you're riding routes where small glass shards are a regular occurrence, sealant-backed tubeless is still a different category of protection.
The decision framework: six questions
Answer these honestly and you'll have your answer.
Q1: How often do you actually puncture? Muc-Off's 2023 puncture survey found that on average, riders get one puncture roughly every eight months, and 79% of riders experienced more punctures whilst riding with inner tubes compared to tubeless. If you're puncturing more frequently than average, particularly with small glass or thorn punctures on your regular routes, tubeless starts to pay for itself quickly.
Q2: What kind of roads do you ride? Smooth A-roads and bike paths? Tubes are fine. Broken tarmac, chip-seal, winter grit lanes, or anything resembling a farm track? Tubeless earns its keep. The lower pressure you can run tubeless means more tyre contact, more comfort, and a noticeably better feel on rough surfaces.
Q3: How much maintenance are you willing to do? Sealant doesn't last forever. Hunt Bike Wheels recommends topping up every 2–3 months depending on storage conditions. Muc-Off advises every six months. BikeRadar suggests the three-to-six-month range as a general rule and recommends a full tyre removal for inspection periodically. That's not a huge amount of work, but it is scheduled work, and if you skip it, you'll find out the hard way on a long ride.
Q4: Do you ride events, sportives, or club runs where a long stop matters? On a group ride or a timed event, a five-minute tubeless plug attempt followed by a tube installation is a significantly worse outcome than a two-minute tube swap. If you're riding competitively or with a group where no one waits, carry a tube even with tubeless. Think of it as insurance.
Q5: Are your wheels and tyres already tubeless-ready? This is the practical gating question. If your wheels are tubeless-ready and you already have TLR tyres, your conversion cost is low: rim tape (if not already fitted), valves, and sealant. If your wheels aren't TLR, converting is possible with some rims but not guaranteed to work cleanly, and a failed tubeless setup is the worst of both worlds.
Q6: Do you run hookless rims? Hookless rims (increasingly common on carbon wheels) have different safety requirements. Not all tyres are rated for hookless rims, and running an incompatible tyre can lead to sudden bead failure. Always check the rim manufacturer's approved tyre list and any published compatibility standards before fitting a new tyre to a hookless rim, tubeless or otherwise.
If you choose tubeless: set it up properly
Compatibility check first
Before buying sealant, confirm your rim is TLR or TR and that your chosen tyre matches. A TLR tyre on a non-TLR rim may seat but may not hold pressure reliably. Cross-reference both the rim and tyre manufacturer's guidance.
Tools you'll need
- Tubeless-specific rim tape (correct width for your rim bed)
- Tubeless valves (matched to your rim depth)
- Valve core remover (to add sealant through the valve)
- Sealant syringe or injector
- Floor pump with gauge (and ideally a CO2 canister or track pump for initial bead seating)
- Tyre plug kit for the road (a must-carry)
- A bucket of patience for the first setup
Stan's Tubeless Guide is a solid reference for the seating process specifically, particularly if you're dealing with a tight bead.
Sealant management
This is where most tubeless setups quietly fail. Recommendations vary by sealant brand and climate:
- Hunt Bike Wheels: top up every 2–3 months
- Muc-Off: every 6 months
- BikeRadar: general range of 3–6 months, with a periodic full removal
A practical approach: check sealant volume when you do any tyre removal, and shake the wheel before a big ride to confirm you can hear sealant moving. If it's silent and feels too light, top up. Dried sealant looks like rubber clumps inside the tyre and won't re-activate, when you see that, it's time for a full clean.
Pressure guidance
Tubeless lets you run lower pressures than tubes on the same tyre, typically because there's no pinch flat risk. But 'lower' doesn't mean 'soft'. The right pressure still depends on your tyre width, your weight, your rim width, and road conditions. Always start with the tyre manufacturer's recommended pressure range for your weight and tyre width, then experiment downward in small increments. On narrower road tyres (23–25mm), the range for tubeless is still higher than on gravel. On wider road tyres (28–32mm), the comfort and compliance benefit of running tubeless at lower pressures becomes much more noticeable.
Troubleshooting common problems
Bead won't seat: Usually a rim tape issue (bubbles, gaps over spoke holes) or a mismatch between tyre and rim width. Re-tape carefully and ensure tape coverage is fully sealed before adding sealant.
Valve leaking at the base: The valve nut may be overtightened (can distort the seal) or undertightened. The rim tape hole may also be too large. Try a different valve or re-tape.
Sealant leaking through the tyre sidewall: Some sealant weeps through porous sidewalls initially, this usually seals within a few rotations. If it continues, the tyre may not be TLR-rated and the sidewall isn't sealed.
Tyre burping: This is the tubeless-specific failure where the bead briefly loses its seal under hard cornering or impact, releasing air. It usually means pressure is too low for the conditions or the tyre/rim combination doesn't seat tightly enough. Run slightly higher pressure or try a different tyre.
Puncture too large to seal: Sealant handles small holes well. For larger cuts, use a plug kit immediately, most plug kits will fix holes that sealant can't. If the cut is large enough that the plug doesn't hold, install a tube and get home.
Dried-up sealant: No fix at the roadside. This is a maintenance failure. The tyre becomes a standard tubed tyre at this point, install your emergency tube and book a proper service when home.
If you choose tubes: make them work for you
Pick the right tube
Standard butyl tubes are reliable and cheap. For a road bike, 60–80g butyl tubes are a fine choice if you're not worried about marginal weight savings. TPU tubes (brands like Tubolito, Pirelli Smartube, Revoloop) are considerably lighter and roll well, worth considering if you want a performance edge without the tubeless setup. Latex tubes offer low rolling resistance but are more fragile and lose pressure overnight, so they need daily pumping.
For most club riders and sportive regulars, TPU is probably the best value upgrade from standard butyl, you get most of the performance benefit with minimal extra complexity.
Pressure and pinch flat risk
With tubes, the minimum pressure you can safely run is constrained by pinch flat risk. Going too low on a stiff-rim road bike with narrow tyres means any sharp pothole impact could snake-bite. Stick within the tyre manufacturer's recommended range and don't chase lower pressures to mimic the tubeless feel, it won't work the same way.
What to carry on a road ride
At minimum: two spare tubes, two tyre levers, a CO2 canister (or small pump), and a couple of tyre boots (foil wrappers work in a pinch for sidewall cuts). If something catastrophic happens, you want the option to repair twice without stopping at a shop.
Your upgrade path to tubeless
If you're currently running tubes but thinking ahead: start by swapping to TLR tyres. They work fine with tubes in the meantime and give you one less thing to change later. Then, when you're ready, add rim tape and valves (some tubeless-ready wheels already have this fitted at the factory) and make the switch.
Racing and events: what to check before you line up
The most common question here is: can you run a tube inside a tubeless-ready tyre? Yes, in most situations. A TLR tyre is compatible with a standard tube as a backup or permanent setup, it just won't self-seal. The tyre bead is designed to seat tightly, so it can feel snug when fitting a tube, but it works. This is also your go-to emergency fix mid-event: remove the sealant-coated remains, fit a tube, and continue.
For events, check your race or sportive rules specifically. Most open events and sportives don't dictate tyre setup. UCI or closed circuit events may have specific regulations. When in doubt, confirm with the organiser.
On hookless rims: this point bears repeating. Running a tyre not rated for your hookless rim at high pressure can result in sudden bead ejection. Before any event, verify your tyre is on your rim manufacturer's approved compatibility list. This isn't a theoretical concern, it's a documented safety issue.
FAQs
Do tubeless tyres prevent pinch flats on road bikes?
Yes, completely. Pinch flats (snakebite punctures) happen when a tube is compressed between the tyre and rim under impact. With no tube present, there's nothing to pinch. This is one of the clearest advantages of tubeless on roads with potholes or rough surfaces.
How often should I top up tubeless sealant?
Recommendations vary: Hunt Bike Wheels advises every 2–3 months, Muc-Off every 6 months, and BikeRadar suggests the 3–6 month range as a general rule. In practice, check it quarterly and do a full removal and re-seal at least once a year. Hot, dry storage conditions will dry sealant faster.
Can I use inner tubes in tubeless tyres?
Yes. A tubeless-ready tyre accepts a standard inner tube without any modification. You lose the self-sealing benefit, but the tyre itself functions normally. This is also the standard roadside emergency procedure when a tubeless puncture is too large to plug.
Will tubeless tyres make me faster?
Possibly, but don't take any specific rolling resistance claim at face value without checking the test methodology. At an equivalent pressure, a tubeless setup can reduce rolling resistance by eliminating tube friction inside the tyre. Run at the right (often lower) pressure, tubeless can also improve comfort on rough roads without costing speed. The gains are real but are typically marginal at road cycling speeds, measured in seconds over long distances rather than minutes.
What size punctures can sealant seal?
This varies by sealant brand and tyre construction, so treat any specific number cautiously. In general, quality sealants handle small holes from glass, thorns, and small debris reliably. Larger cuts, particularly anything you'd describe as a gash or a tear, typically need a plug or a tube. If a puncture is large enough to cause sudden pressure loss rather than a slow deflation, sealant alone won't save the ride.
Of course, even the best tyre setup can't fix a bad day out on the road. Knowing your route, the conditions, and your likely exposure to rough surfaces is half the battle. Tools like Tailwind GPS help here, by scoring your routes hour by hour for wind, rain, and conditions, you're already making smarter decisions before the first pedal stroke. Fewer unpleasant surprises out there means fewer situations where your tyre choice gets tested in anger.
Whichever system you run, the best setup is the one you've set up correctly, maintain consistently, and know how to fix when it goes wrong. Pick the one that matches how you actually ride, not the one your fastest club mate uses.
Check conditions first
Score your route hour by hour for wind and rain before you head out.
Related posts

Introducing Ride Huddles: a simple way to choose your next group ride
Ride Huddle is a simple way for groups to choose a route together. Create a Huddle, add your routes, share one link, and let everyone vote — free, with no account required.
·2 min read

How to navigate a cycling route without getting lost
Stay on the line with in-browser turn-by-turn: voice prompts, navigate-to-start, and rerouting. Tailwind GPS is the phone navigation — export GPX only for a head unit.
·8 min read
How to plan a cycling route and navigate it on your phone
Plan a cycling route on your phone, pick the best hour, then start in-browser turn-by-turn. Tailwind GPS includes voice prompts, navigate-to-start, and rerouting.
·6 min read